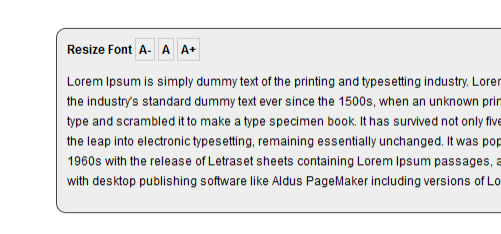
The purpose of blog or website constitute sharing information on the web. Most of the form of sharing through web deals with reading. OK, so you have a blog or website which has daily users of different kind. Lets say readers who prefer large fonts and readers who prefer small fonts for reading. So using a default size font won’t make them happy. Whats to do then? Instant Font Resizer. The reason why I am calling this instant is because, while changing the font size the page don’t need a refresh, so your readers can see instant changes in font size.
Instant font resizing can be achieved in many ways. For this tutorial I am using jFontSize a newly released jQuery plugin. Lets us go to implementation of font resizing in your blog or website.
Step 1: Download and Upload jFontSize
Download jFontSize and upload it to your server. After uploading, add the following script to header.php (WordPress), index.html(HTML) and place it before </head>
<script src="http://www.jfontsize.com/files/jquery.jfontsize-1.0.js" type="text/javascript"/>
Step 2: CSS – To customize the look
CSS is used here to customize the font resize to match your blog or website’s design. For beginners, I recommend to stick with the default CSS provided here. The CSS codes has to added to your existing theme’s stylesheet.
.jfontsize-button {
    font: bold 12px arial;
    padding: 3px;
    border: solid 1px #ccc;
}

.jfontsize-button:hover {
    text-decoration: none;
    background: #333;
    color: #fff;
    border: solid 1px #333;
}

.jfontsize-disabled, .jfontsize-disabled:hover {
    color: #aaa;
    border: solid 1px #eee;
    background: #eee;
}
Step 3: To Assigning font resizing function
In order to generate the font resize button, add the following code to whatever location you want it to be displayed
<a id="jfontsize-minus" class="jfontsize-button" href="#">A-</a>
<a id="jfontsize-default" class="jfontsize-button" href="#">A</a>
<a id="jfontsize-plus" class="jfontsize-button" href="#">A+</a>
After that, you should point jFontSize to change a specific location where you need the content’s font size to be resized. Suppose, you want to increase the font size of the entire post (including title and content) copy the class name used in your theme (e.g.: content-wrap) and paste that instead of PUT-THE-CLASS-NAME in the code below
The final code would look like for a HTML website.
<a id="jfontsize-minus" class="jfontsize-button" href="#">A-</a>
<a id="jfontsize-default" class="jfontsize-button" href="#">A</a>
<a id="jfontsize-plus" class="jfontsize-button" href="#">A+</a>
<p class="PUT-THE-CLASS-NAME">
Place your content here
</p>
<script type="text/javascript" language="javascript">
                        $('.PUT-THE-CLASS-NAME').jfontsize({
                            btnMinusClasseId: '#jfontsize-minus',
                            btnDefaultClasseId: '#jfontsize-default',
                            btnPlusClasseId: '#jfontsize-plus'
                        });
</script>
Your done. For demonstration I have used <p>, its up to you to change it to span or div. Also its not required to keep the <p> between the font resize buttons and the script.
P.S – Download and live demo links are on the sidebar.


